
 Using templates to configure your network devices have several benefits. This post describe how you can use Numbers for Mac to create a dynamic template you can use to create new configuration files. If your network consists of several routers you generally want them to share as much configuration as possible with each other. Say you have several branch offices which all has a local router which connects to the data center. Chances are that those branch office routers will be configured in the same way. The difference in configuration will mainly be hostnames, ip addresses and perhaps access-lists. When it’s time to connect a new branch office you can cut and paste parts of the config from another router or you can use a template. In the network-device-template.numbers released in Nelkit, I’ve used a simple configuration for a Cisco 880 router. However the example can be used for any type of device which uses a text based config.
Before you continue reading make sure you download Nelkit, and open up the network-device-template.numbers file, located in the templates folder.
You will find three sheets.
The purpose of the this isn’t to provide you with a template you can use in your network. Rather it is intended to help you create your own template files in Numbers. In this example scenario you are setting up a branch office router with two VLANs behind it called INSIDE and MANAGEMENT. Additionally we can create up to three optional VLANs. Looking at the Data sheet we can set hostname and the ip address details for these networks.
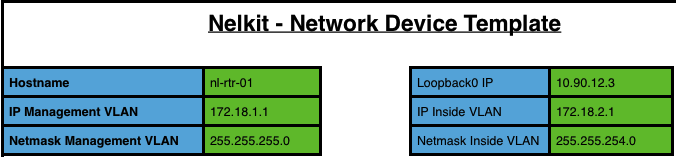
Making changes in the green cells will change the corresponding cell in the Configuration sheet. All the variables in the configuration is marked with green to be easily identifiable. 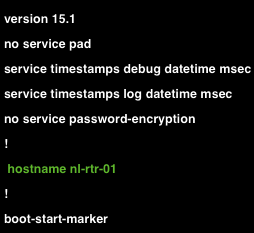 So changing the hostname setting the the B3 cell in the Data sheet will also change the hostname in the configuration sheet, cell A8. This is done by using the Concatenate function in Numbers. Basically the string “hostname “ is concatenated, or added, to the value in the B3 cell from the Data sheet. To setup a function like this you can mark an empty cell and press the function button, or Insert and Function. Choose Concatenate from the Text functions and insert. The formula for the function looks like this: CONCATENATE(“string1”,”string2”). This is while using the regional settings for United States, you might have to change the comma between the strings to “;” if you have another regional setting. In our example the first string is “hostname “, i.e. hostname with a space afterwards. This is then added before the value of another cell which contains the actual hostname. When you’ve added the first string with quotation marks around, write a comma to separate the strings. Then you can click to the Data sheet and the B3 cell to choose the hostname. Once you click accept the line should read “hostname nl-rtr-1”. Moving down to the Loopback0 interface in the Configuration sheet cell A59 to A60. Here we insert a new string after the variable ip address. Other than that it is the same formula which looks like this: CONCATENATE(“ ip address “,Data::Table 1::E3, “ 255.255.255.255”). So we concatenate “ ip address “ to the value in the E3 cell in the Data sheet and “ 255.255.255.255”. In another example in Configuration cell A84 to A86 we setup the management VLAN. As per the Data sheet we can choose the ip address and subnet mask for this interface. This means that in cell A86 we have to concatenate two variable cells. This works in the same way as with the loopback interface, only we also choose an additional cell containing the subnet mask.
The next function is the additional VLANs which might be available at the branch office site.

In the additional VLAN section there are three available slots for more VLANs, where two are checked by default. If you click the checkboxes you will see that VLANs and vlan interfaces are created or removed from the configuration. This is done by using an additional function called “if” which checks if the checkbox has been checked or not. The first example of this is in the cells A48-A49 in the Configuration sheet. The if function in the A48 cell checks to see if the checkbox in cell A8 in the Data sheet has been checked. If not checked it will just print out a “!” (a comment in a Cisco IOS configuration), if the box is checked it will print out “vlan “ along with the VLAN number in the B8 cell. You can test this by removing or adding the checks. These checkboxes also control the vlan interface settings in the cells A92 to A102 (in Configuration). Looking at the if-statement in A48 it looks too see if the value of DATA:A8 is true (i.e. the box has been checked). If the box is checked the A8 cell will contain the first statement which is in bold to clarify. If the box hasn’t been checked the cell will contain the results from the second statement, this one is in italics.
IF(Data::Table 1::A8=TRUE,CONCATENATE(“vlan “,Data::Table 1::B8),”!”)
So the vlan and interface vlan commands are implemented by combining the concatenate function, we used previously, with the if function.
The example provided in this template file is just a very basic config and won’t do you much good. The point isn’t to be useful in itself but to show you how you can create your own templates. Once finished you can just cut and paste the configuration.
The template file was created with Numbers 3.0.1 for Mac and also works on Numbers for iPhone and iPad.
Creating templates in this way might be a pale comparison to having an enterprise provisioning system. However if you don’t have a system like that these templates could be very useful.