
 RANCID is a config differ. In itself that’s just as boring as it sounds. However picture this; you’ve just arrived at the office after a maintenance window. End users have started to complain about systems which have stopped working. The technicians who worked during the night are sleeping and they seemed to have forgotten to document what they did. If you had it installed RANCID could have told you exactly what configuration the technicians changed. Aside from showing you what changed during last night RANCID shows you all the changes since it was introduced. So if you hade been using RANCID for three years it could show you all the changes on all your network devices since that time. Having all your configurations stored on the RANCID server also works as a backup. Though great for collecting device configurations you can also use RANCID to get specific information from your devices by sending a command to several nodes, such as “show ip route” or “show crypto pki certificates”. Taking it a step further you can use it to change configurations, so if you need to change an access list on all firewalls or routers you can use RANCID to do so.
Though RANCID might not be perfect, it’s really simple to use. If you don’t have anything like it RANCID will be a great tool for you.
There are packages for a range of different Linux distributions. You can install it on CentOS 6.4 by running:
sudo rpm -Uvh --replacepkgs http://dl.fedoraproject.org/pub/epel/6/x86_64/epel-release-6-8.noarch.rpm
sudo yum install rancid cvs
On Ubuntu 12.04 LTS or Debian 7.4 you use apt to install:
sudo apt-get install rancid
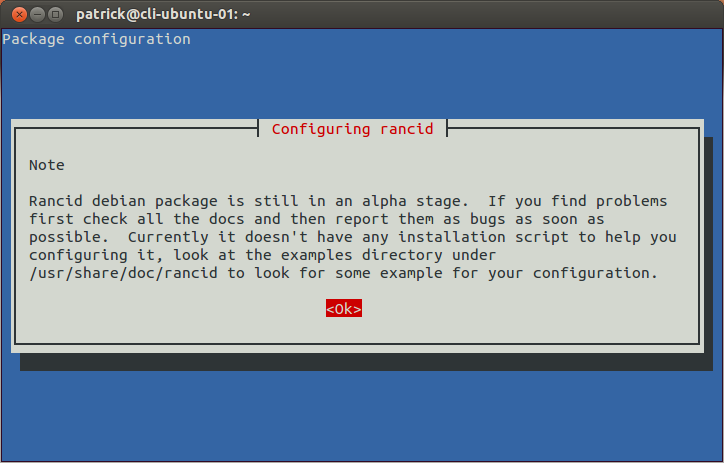
You will note if you install the Debian or Ubuntu packages you will be presented with an informational text which says it is an early release of the package. It is however functional.
As usual when you are using packages from a distribution you won’t always have access to the latest version. If you need or want this you can install RANCID from the source tarballs instead. Should you choose that route you can still use this guide to help you setup RANCID.
RANCID doesn’t run natively on Windows. You might have some luck running it through Cygwin. I would still recommend you to install a Linux machine. However if you are a native Windows user I can recommend CatTools instead. CatTools is similar to RANCID in many ways and most of what you want to do works in both products.
For the purpose of testing let’s say you are installing RANCID in a network where you have a headquarter and four branch offices. In the headquarter there is one router, one distributions switch, three access switches and six stand-alone access-points. In each of the branch offices you have one router, one access-switch and two access-points. You want to use RANCID to handle all of these devices.
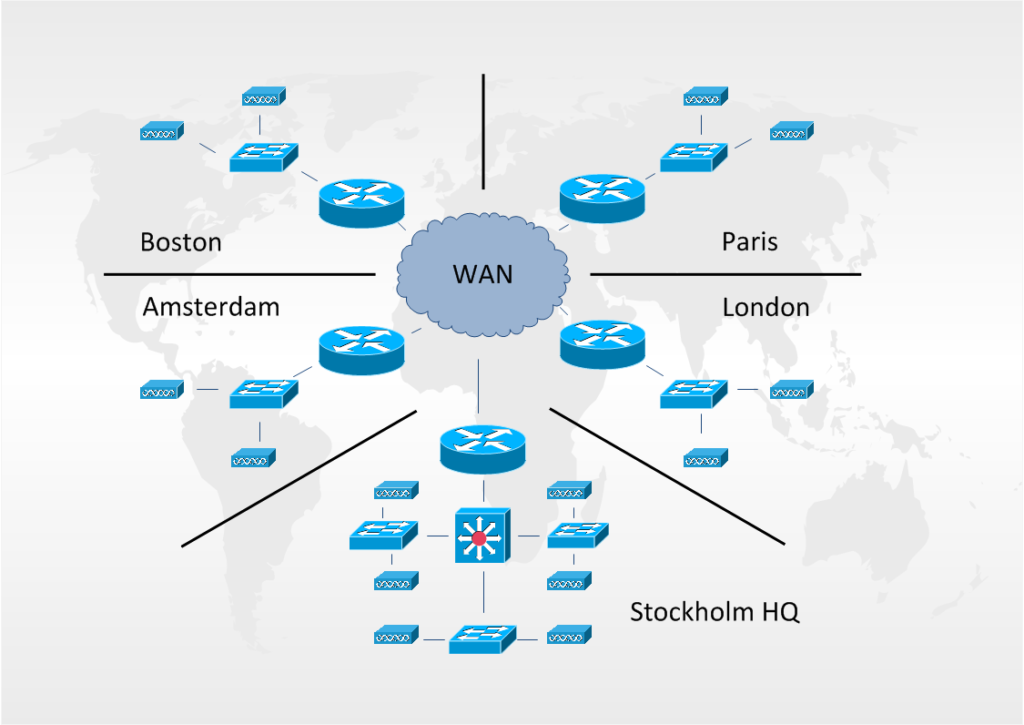
So in our network we will have these devices:
Stockholm: sth-rtr-1, sth-dsw-1, sth-asw-1, sth-asw-2, sth-asw-3, sth-ap-1, sth-ap-2, sth-ap-3, sth-ap-4, sth-ap-5 and sth-ap-6
Boston: bos-rtr-1, bos-asw-1, bos-ap-1 and bos-ap-2
Amsterdam: ams-rtr-1, ams-asw-1, ams-ap-1 and ams-ap-2
Paris: par-rtr-1, par-asw-1, par-ap-1 and par-ap-2
London: lon-rtr-1, lon-asw-1, lon-ap-1 and lon-ap-2
The first thing you configure after installing RANCID is the list of groups you will use. If you haven’t used RANCID previously it can be hard to know how you should setup your groups, or why for that matter. The easiest way is to just create a group called “all” and store all devices in that group.
So what is a group? In this context a group is a collection of network devices. When a change is made to a device an email will be sent notifying the group admins. Looking at the test network a technician in Boston might not be interested about changes made to the switch in London. In than case you could create separate groups for each branch office. Another scenario might be that you have a wireless admin who handles all of the access-points (and in this case hasn’t persuaded management to invest in a WLAN Controller). Here you might want to create separate groups for each device type, i.e. one group for routers one for switches and one for access-points.
Another way to use groups aside from separating the change notifications is that RANCID will store all device configurations from a group in a separate directory. So if you want to use the Unix command ‘grep’, or similar, to find things in your configuration, it can be useful to think about how you setup your groups. If you are unsure you can always change this at a later stage.
The groups are setup in the /etc/rancid/rancid.conf file. In this example we setup the groups by device type:
# list of rancid groups
LIST_OF_GROUPS="routers switches access-points"
RANCID sends emails to the aliases rancid-[groupname] and rancid-admin-[groupname]. So edit your /etc/aliases file (or similar) as:
rancid-routers:             router-admins@yourcompany.com
rancid-admin-routers:       router-admins@yourcompany.com
rancid-switches:            switches-admins@yourcompany.com
rancid-admin-switches:      switches-admins@yourcompany.com
rancid-access-points:       ap-admins@yourcompany.com
rancid-admin-access-points: ap-admins@yourcompany.com
By default RANCID uses CVS to keep track of changes to your devices, you can also set it up to use Subversion. To prepare the CVS database you have to run the command rancid-cvs as the rancid user (which was created by the install). This needs to be done each time you add a new group.
sudo -i -u rancid
/var/lib/rancid/bin/rancid-cvs (on Debian and Ubuntu)
/usr/bin/rancid-cvs (on CentOS)
This will create a directory for each group in /var/lib/rancid (Debian and Ubuntu) and /var/rancid (CentOS). So the routers group will be located in the /var/lib/rancid/routers directory on Debian or Ubuntu, and in the /var/rancid/routers directory if you are using CentOS.
The router.db file is specific for each group and located in the group directory. Add devices to the group as per below
Routers (/var/lib/rancid/routers/router.db or /var/rancid/routers/router.db):
sth-rtr-1:cisco:up
bos-rtr-1:cisco:up
ams-rtr-1:cisco:up
par-rtr-1:cisco:up
lon-rtr-1:cisco:up
Switches /var/lib/rancid/switches/router.db or /var/rancid/switches/router.db:
sth-dsw-1:cisco:up
sth-asw-1:cisco:up
sth-asw-2:cisco:up
sth-asw-3:cisco:up
bos-asw-1:cisco:up
ams-asw-1:cisco:up
par-asw-1:cisco:up
lon-asw-1:cisco:up
Access Points:
sth-ap-1:cisco:up
sth-ap-2:cisco:up
sth-ap-3:cisco:up
sth-ap-4:cisco:up
sth-ap-5:cisco:up
sth-ap-6:cisco:up
bos-ap-1:cisco:up
bos-ap-2:cisco:up
ams-ap-1:cisco:up
ams-ap-2:cisco:up
par-ap-1:cisco:up
par-ap-2:cisco:up
lon-ap-1:cisco:up
lon-ap-2:cisco:up
Credentials to access the devices is stored in the .cloginrc file which you create in the rancid users home directory /var/lib/rancid (Debian and Ubuntu) and /var/rancid (CentOS). Edit the file and add these lines:
add autoenable * 1
add method * ssh
add user * rancid
add password * s3ctetp@ssw0rd
This will tell RANCID to login to all devices (*) with SSH. To login with the username rancid and password s3ctetp@ssw0rd to all devices. The autoenable line tells RANCID that the devices are configured to place the rancid user in enabled mode directly after login. It is also possible to configure the .cloginrc file so that RANCID issued the enable command and password. Or use a different username and password against some of your devices such as:
add user *-asw-* rancid-switch-user
add password *-asw-* $witchpassw0rd
Since RANCID will login directly to the devices it’s a good idea to lock down what the rancid user can do with Tacacs command authorization. So that RANCID is only allowed to run certain show commands. If you don’t have a Tacacs server you can also use cli-views with RADIUS.
You must also change the access to the file in order to lock it down:
chmod 600 .cloginrc
Once the authentication has been setup you can test to see that it works. Using the rancid user (sudo -i -u rancid) you can try to login to one of the devices. Logging into cisco devices is done by the clogin command located in /var/lib/rancid/bin (Debian and Ubuntu) and /usr/libexec/rancid (CentOS). You might want to add these to your path. Also while in that directory you will notice other *login files. For example hlogin is for HP devices and flogin is for Foundry.
clogin sth-asw-2
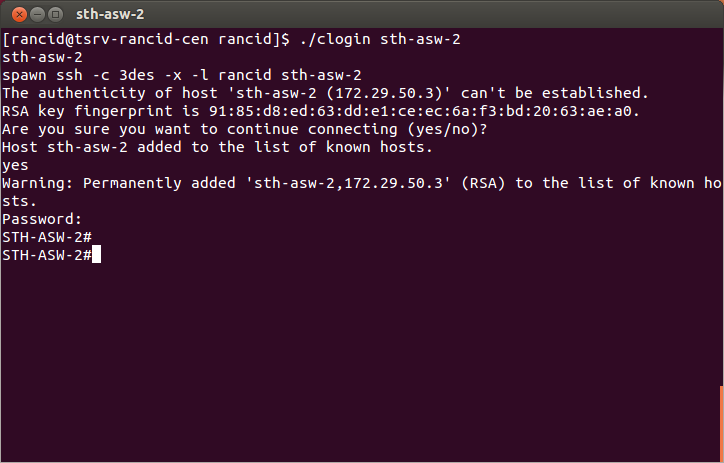
You should now be logged into the switch without and can type exit to return to the server.
In order for RANCID to keep track of changes you have to schedule a cronjob with will run as the rancid user.
crontab -e

0 * * * * * /usr/bin/rancid-run
This will schedule a run each hour and notify the members of the respective group each time any of the devices change. You can of course set it to run how often you like, for some environments once every night might be enough. Another option is to have separate schedules for each group. If rules are added or removed constantly in your firewalls but your switches rarely change you might want to have different schedules for those groups.
Once you have executed rancid-run or it has been run by cron your device configurations will be stored in the configs directory for each group. Each time RANCID detects a change it will create a new revision and store what changed since the last run.
[rancid@tsrv-rancid-cen configs]$ cvs log sth-asw-2

RCS file: /var/rancid/CVS/switches/configs/sth-asw-2,v
Working file: sth-asw-2
head: 1.3
branch:
locks: strict
access list:
symbolic names:
keyword substitution: o
total revisions: 3;     selected revisions: 3
description:
----------------------------
revision 1.3
date: 2014/04/04 20:01:11;  author: rancid;  state: Exp;  lines: +5 -4
updates
----------------------------
revision 1.2
date: 2014/04/04 19:01:06;  author: rancid;  state: Exp;  lines: +446 -0
updates
----------------------------
revision 1.1
date: 2014/04/04 19:00:09;  author: rancid;  state: Exp;
new router
=============================================================================
[rancid@tsrv-rancid-cen configs]$
Examining the output you can see that there are three revisions of sth-asw-2 so far. 1.1 when the file was created. 1.2 when rancid-run collected the configuration for the first time and adding 446 lines. The last revision 1.3 added 5 lines and removed 4.
You can then use cvs dif to see what changed between revisions.
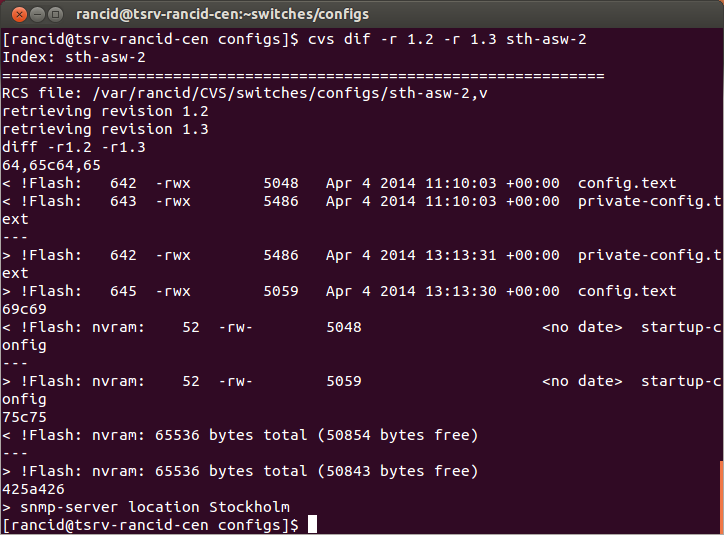
Looking at the above picture might show us more information than we actually want. First we see changes in the filesystem on the switch as the size of the configuration file grows, or shrinks, as we change the configuration. Then at the bottom we see what was actually changed. In this case the line “snmp-server location Stockholm” was added since the last rancid-run. It’s possible to exclude part of the output from RANCID if you aren’t interested to changes made to the filesystem.
If you’ve been using RANCID for a long time you can walk up to your coworkers and whisper in their ear; “I know what you did last summer.” (that is if you want to be that kind of guy/girl)
RANCID also ships with a looking glass or you can use cvsweb if you want to view the CVS database in a more user friendly way.
Although it’s great to have the ability to see all the changes made to your network you can also use the clogin program to for more specific tasks. Using clogin -c you can tell RANCID to login to a specific device and run one command. For example:
clogin -c "show processes cpu" bos-rtr-1
Would login to the Boston router and execute the show processes cpu command and then logout of the router. This in itself might not save you that much time, but perhaps you want to run a command several times over a period of time. Then you can schedule a command like this to collect information. Or you can run the command against all your routers.
rancid@tsrv-rancid-ubu:~/routers/configs$ pwd
/var/lib/rancid/routers/configs
rancid@tsrv-rancid-ubu:~/routers/configs$ clogin -c "show processes cpu" `ls *rtr*`
This would list all the files in the config directory with the name *rtr* and then run the command “show processes cpu” on all the matching files, i.e. your routers. You can also separate the commands with a semicolon to run several commands after each other.
clogin -c "show processes cpu;show memory free" ams-rtr-1
Another parameter you can use with the clogin command is -x. It works like -c but instead of typing in the commands you want to execute you store them in a separate file.
clogin -x commands.txt lon-ap-2
The above command would login to the access-point in the London office and execute all the commands you have entered in the commands.txt file. The file could include any command you would type if you logged in to the device with ssh yourself.
Say you are rolling out dot1x within your organization and want to push out a pre-authentication ACL to all your switches you could create a file called access-list.txt which contained:
conf term
ip access-list extended PREAUTH
 permit udp any any eq bootps
 permit udp any any eq domain
 permit icmp any any
end
write mem
Then create a file called switches.txt which contains the names of the switches where you want this change to occur:
clogin -x access-list.txt `cat switches.txt`
If you have hundreds of switches, or even just ten RANCID can really save some time for you. As an added bonus you know that the same configuration is added to each device. If you have locked down the rancid account with Tacacs you won’t be able to change the configuration. Even if you haven’t restricted the rancid account changing configuration this way makes them anonymous since “rancid” made the change. You can setup a .cloginrc file in your own home directory and run the clogin program as your own user. Note though that your password will be in clear text inside the .cloginrc file, a solution might be to encrypt your home directory or to remove the password after you have made your changes.
Making similar changes on all your devices with RANCID is quite straight forward. If you are deploying different configs to your devices, for example access-lists might differ for each router. If you learn some basic scripting and combine those skills with clogin you can collect a lot of specific information for your devices or implement per router specific changes in minutes instead of spending hours doing it manually.
In this guide I’ve shown you the basics of RANCID, but there are a lot of ways you can customize RANCID. Once you have gotten started you might want to dive deeper in the configuration or the rancid program itself in order to add commands which are used by rancid-run or remove others. If you haven’t used RANCID before it might take you some time before you feel the need to change anything. What I want you to take away with you is that it is possible and quite easy to change the defaults.
Now you have a system you can use to collect information from your devices and it will act as a backup and you will see changes. Also you should have a basic understanding of what RANCID can do and how you can save time with it.